Moving Your LaunchBox Instance to a New PC
This page explains how to move your LaunchBox setup to a new PC, covering everything from transferring your games and emulators to ensuring dependencies and settings are correctly carried over for a smooth transition.
Written By AstroBob
Last updated About 1 year ago
Moving your LaunchBox setup to a new PC is a straightforward process, but there are a few things to keep in mind to ensure a smooth transition. This guide will walk you through everything you need to know, including handling games, emulators, and dependencies.
Can I move my LaunchBox build to a new PC?
Yes! LaunchBox is designed to be portable, making it easy to transfer your setup to a new machine. The process involves copying your entire LaunchBox folder to the new PC.
What do I need to transfer?
The entire LaunchBox directory. This folder contains all your settings, themes, media, plugins etc.
What about moving my games?
If your games are stored in the
LaunchBox\Gamesfolder: No additional steps are required. Everything should transfer seamlessly.If your games are stored outside the
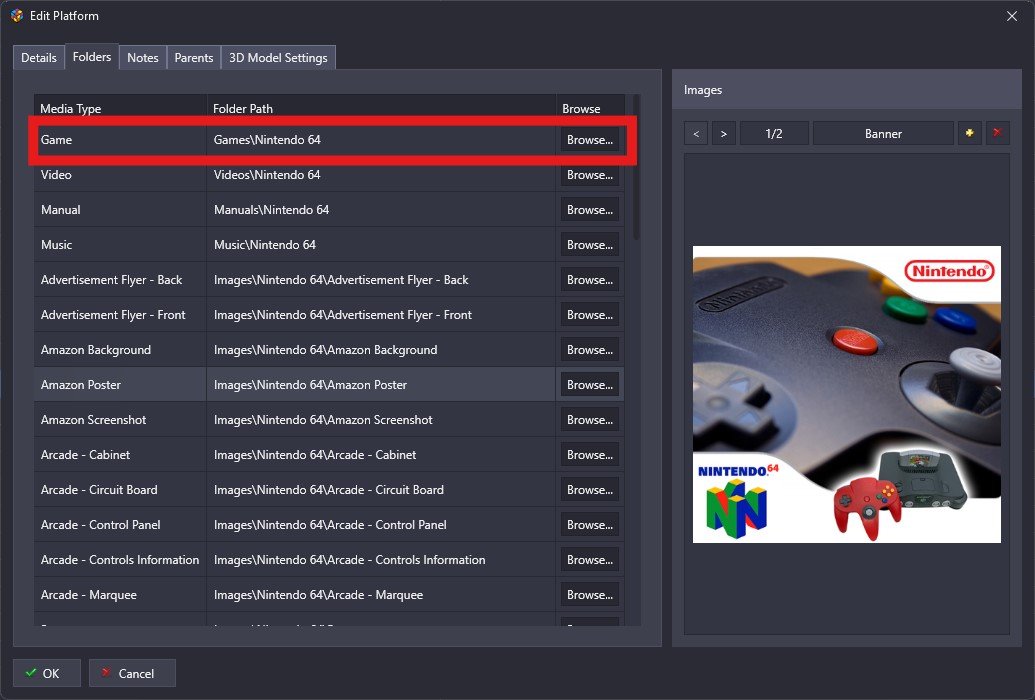
LaunchBoxfolder, You must copy these separately and update the folder paths in LaunchBox for each platform.Navigate to Tools > Manage > Platforms, then within the Edit Platform window, select the Folders to update the games directory
What about emulators?
The key consideration is whether your emulators are located in the LaunchBox\Emulators directory and are set up as portable. Portable emulators, like RetroArch, PCSX2, and Dolphin (when managed through LaunchBox), store all their settings within their own directories, making them easy to transfer.
However, some emulators save preferences and user data outside their folders, typically in the AppData directory. Many emulators offer an option to switch to portable mode, which consolidates all settings within their main folder. Check each emulator’s documentation for instructions on enabling portable mode.
If your emulators are portable: and they live within the
LaunchBox\Emulatorsdirectory, then no additional steps are required. Everything should transfer seamlessly.If your emulators aren’t portable: You’ll need to transfer any settings stored outside the emulator’s directory. Check the emulator’s documentation for details on where its configuration files are stored.
🚨 Don’t forget your BIOS files 🚨
If your emulators or games require additional BIOS files that don’t live within your LaunchBox directory, make sure those are transferred as well.
Are there any dependencies I need to install on the new PC?
Yes, LaunchBox has a few key dependencies:
.NET Core 3.1 Runtime: This is required for the embedded Chromium implementation used in LaunchBox.
You can easily download it from Microsoft’s official site if it isn’t already installed
Operating System: Your new PC must run Windows 10 or above (64-bit). Older versions of Windows 10 may cause issues.
Do I need to re-enter my license?
No, your license lives within your LaunchBox directory. As long as you copy the entire directory, your license will transfer automatically. If you encounter issues, contact support@unbrokensoftware.com for assistance.
What else should I consider?
It's worth backing up your LaunchBox data directory before making changes. You can create a manual backup of your LaunchBox data by navigating to Tools > File Management > Create Data Backup
In Summary
Backup Your
LaunchBoxDirectoryCopy the entire
LaunchBoxfolder to an external drive.Transfer the folder to the desired location on your new PC.
Transfer any games, emulators/settings or BIOS files outside of your
LaunchBoxdirectory (if any)Ensure .NET Core 3.1 Runtime is installed on the new PC.
Test a few games to ensure paths, emulators, and media are functioning correctly.
By following these steps, you can ensure a seamless transition of your LaunchBox instance to a new PC. If you have further questions or encounter any issues, feel free to reach out. Happy gaming! 🎮